The Ultimate Comfort Food: How to Cook Soft Layered Chapati
There are few aromas more inviting than the scent of fresh Kenyan Chapati frying on a hot pan. In Kenya, Chapati is not just a flatbread; it is a celebration. It signifies a special occasion, a family gathering, or simply the best kind of comfort food after a long week. Whether served alongside a rich beef stew, a simple bean curry, or rolled up with a cup of hot, spiced chai for breakfast, this chapati recipe Kenya loves is a beloved staple that transcends social boundaries.
While its origins can be traced back to Indian settlers who brought flatbreads to East Africa, the Kenyan style chapati has evolved into something uniquely its own. It is typically thicker, richer, and decidedly more layered than its Indian cousin. Achieving that perfect balance—crispy and golden on the outside, yet soft and flaky on the inside—is an art form that many aspire to master.
If you have ever struggled with hard, cardboard-like chapatis, or simply want to refine your technique to get those coveted flaky layers, this guide is for you. We will break down the science of the dough, the art of the coil, and the secrets of the pan.
The Cultural Heart of the Kenyan Kitchen
In many Kenyan households, the sound of the rolling pin hitting the board is a signal that something special is happening. Unlike daily staples like Ugali, chapatis are labor-intensive. They require patience, strong arms for kneading, and a watchful eye at the stove. This effort is exactly what makes them a “love language” in East African culture.
At Tujulishane, we believe that food is the ultimate connector. When you learn how to cook soft layered chapati Kenya style, you aren’t just making bread; you are learning a skill passed down through generations. From the bustling streets of Nairobi to rural village kitchens, every cook has their “secret,” but the fundamentals of a great Kenya chapati never change.
See also:The Ultimate Guide to Authentic Kenyan Recipes: A Taste of East Africa
The Science of Softness: It’s All in the Dough
The difference between a hard cracker and a soft, pliable chapati Kenya style starts long before the pan heats up. It begins in the bowl. Many beginners make the mistake of focusing only on the frying, but the chemical structure of your dough determines 90% of your success.
1. Hydration is Key
A dry, stiff dough will yield a dry, stiff bread. The dough should be soft and slightly tacky (sticky) to the touch. Using warm water—not cold—helps to soften the gluten strands and hydrate the flour more efficiently. Some chefs even swear by using warm milk or a mixture of water and coconut milk for an even richer, softer texture.
2. The Magic of Resting
This is the step most beginners skip, and it is fatal to softness. After kneading, the gluten in the flour is tight and tense. If you try to roll it out immediately, the dough will “snap back” like a rubber band. You must cover the dough and let it rest for at least 20 to 30 minutes. During this time, the gluten relaxes, and the moisture redistributes evenly, ensuring a tender bite and an effortless rolling process.
The Secret to Flaky Layers: Understanding “The Coil”
If you simply roll out a ball of dough and fry it, you will get a delicious flatbread, but it won’t be a true Kenya chapati. The hallmark of the local style is the distinct separation of layers, similar to a croissant or puff pastry. This is achieved through a specific lamination technique:
- The First Roll: Roll a ball of dough out into a thin, almost translucent circle.
- The Oil Barrier: Brush the surface generously with vegetable oil or ghee. This oil acts as a physical barrier, preventing the layers of dough from fusing back together during the final cook.
- The Rope & Coil: Roll the dough up tightly like a yoga mat to form a long rope. Then, wind that rope around itself like a snail shell to form a “coiled ball.”
When these coils hit the hot pan, the moisture trapped between the oiled layers turns to steam. This steam pushes the layers apart, creating those irresistible, flaky “skins” that you can peel away one by one.
Troubleshooting: Why is my Chapati Hard?
Even with a great chapati recipe Kenya style, things can go wrong. Here are the most common reasons your chapatis might be turning out like cardboard:
- The “Cold Pan” Syndrome: If your pan isn’t hot enough, the chapati sits there drying out for too long before it browns. You want a medium-high flame that produces spots within 60 seconds.
- Too Much Flour: When rolling out your final circles, use the absolute minimum amount of “dusting flour.” Excess flour burns in the pan and creates a dry, dusty exterior.
- Exposure to Air: As soon as a chapati leaves the pan, it must be covered. Placing them in a closed container or wrapping them in a heavy kitchen towel allows the internal steam to keep the stack soft.
See also:How to Make Perfect Ugali and Sukuma Wiki – A Classic Kenyan Dish
<a id=”recipe-card”></a>
Authentic Kenyan Chapati Recipe (Soft & Layered)
- Prep time: 45 minutes (includes resting)
- Cook time: 15 minutes
- Total time: 1 hour
- Servings: 8–10 Chapatis
- Category: Side Dish/Flatbread
- Cuisine: Kenyan
Ingredients
- 3 cups All-Purpose Flour (plus extra for dusting)
- 1 cup Warm Water (adjust for a soft, tacky dough)
- 1 tsp Salt
- 1 tbsp Sugar (optional, for that classic golden browning)
- 3 tbsp Vegetable Oil (for the dough)
- Extra Oil (for lamination and frying)
Instructions
1. Mix and Knead
In a large bowl, whisk together the flour, salt, and sugar. Add 3 tablespoons of oil and the warm water gradually. Knead the mixture for 10–15 minutes until the dough is smooth, elastic, and slightly tacky. If it’s too sticky, add a tablespoon of flour at a time.
2. The Crucial Rest
Cover the dough with a damp cloth or plastic wrap. Let it rest for at least 20 minutes. This relaxes the gluten, which is the secret to a soft layered chapati that doesn’t snap back when rolled.
3. Portion and Laminate (The “Coil”)
Divide the dough into 8–10 equal-sized balls. On a lightly floured surface, roll one ball into a thin circle. Brush the surface generously with oil. Roll the circle up tightly like a rope, then wind that rope into a “snail shell” coil. Tuck the end underneath.
4. Second Rest
Let your coiled balls rest for another 10 minutes. This makes the final rolling process effortless and keeps the layers distinct.
5. Final Roll and Fry
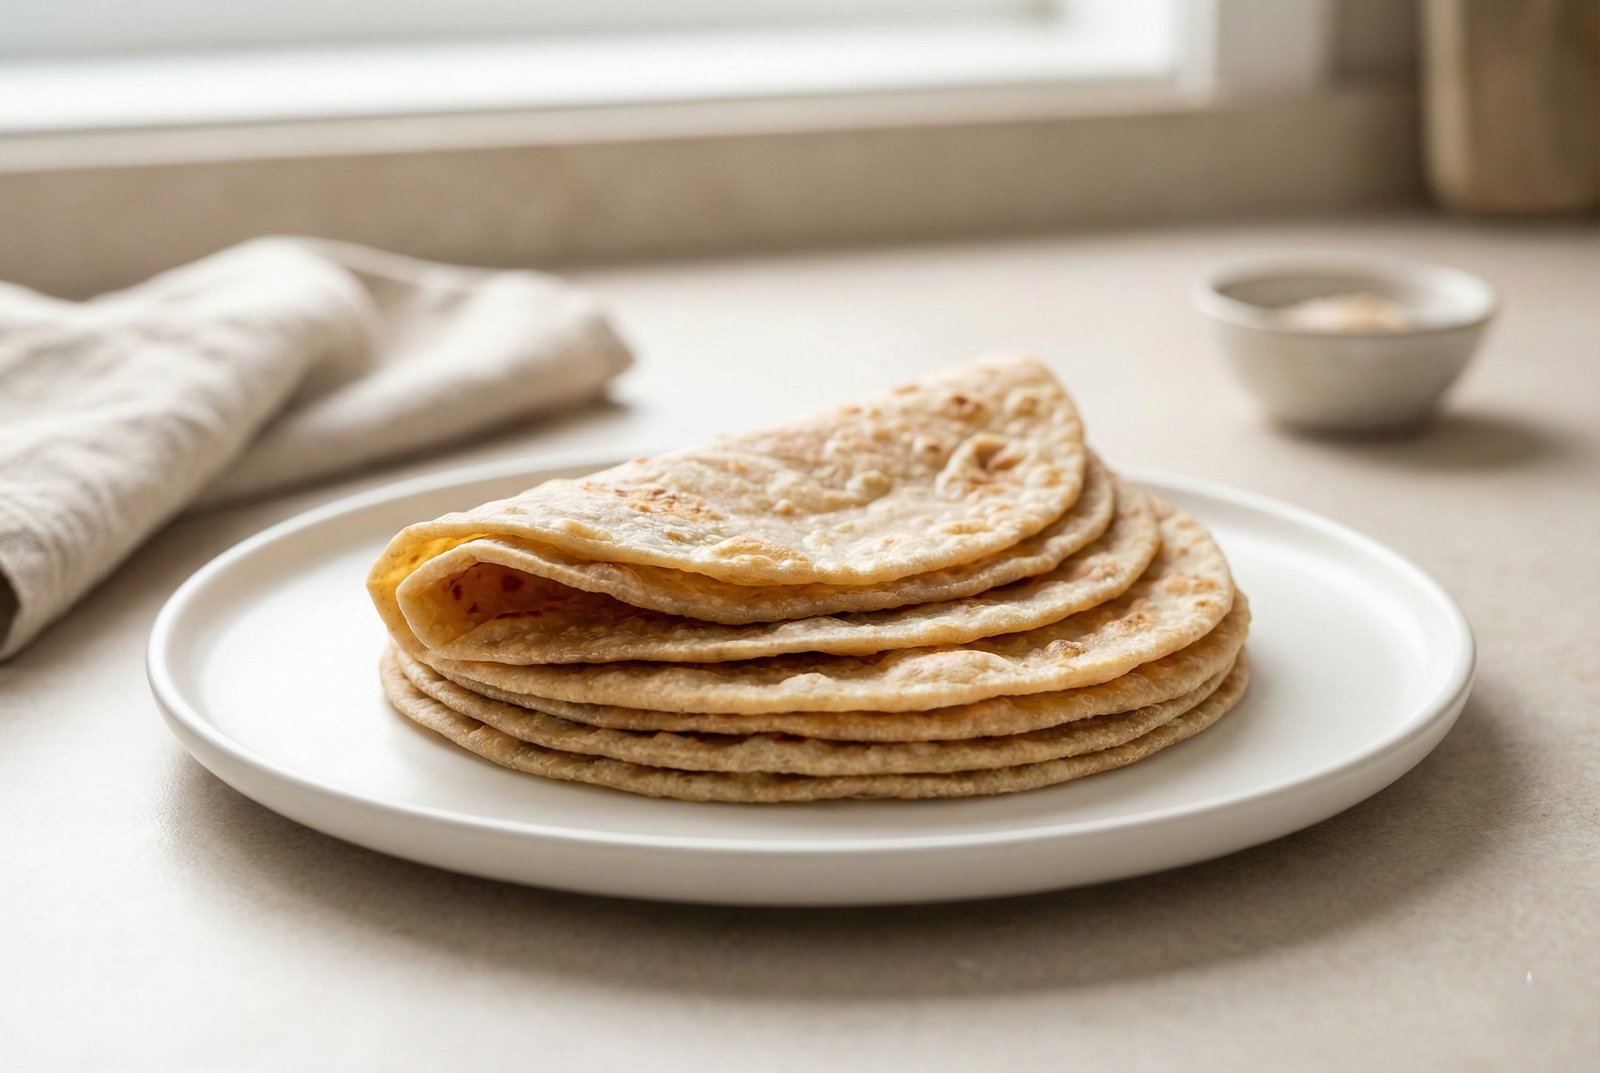
Roll each coil into a flat circle (about 1/8 inch thick). Place on a preheated medium-high pan. Once bubbles appear, flip it. Brush the cooked side with oil, flip again, and repeat until both sides have the signature golden-brown “leopard spots.”
6. Keep Them Soft
As you remove them from the pan, place the chapatis in an insulated container or wrap them in a clean kitchen towel. The steam helps them stay pliable and soft for hours.
The Best Ways to Serve Kenyan Chapati
The versatility of this bread is unmatched. It is the ultimate “edible utensil.”
- The Stew Companion: It is the mandatory partner for Ndengu (Green Gram Stew) or a thick Beef Karanga.
- The Breakfast Staple: In Kenya, a “dry” chapati with a cup of hot, ginger-infused tea (Chai) is a breakfast of champions.
- The “Rolex”: Follow the Ugandan tradition by rolling a thin omelet inside your chapati for a portable snack.
See also:The Ultimate Guide to Kenya’s 47 Counties: Codes, Capitals, and Hidden Gems
Conclusion
Mastering the Kenyan Chapati is a journey. Your first few might be slightly misshapen, but the “rhythm” of the rolling pin and the sizzle of the pan are skills that come with practice. Once you tear into that first perfectly flaky, soft layer, you’ll understand why this is the pride of Kenyan cuisine.
Click here to view the full recipe card and start cooking